Written by Kate Tietje and updated by Sarena-Rae Santos in October of 2023.
Suppose you read Earthley’s guide, Simplify Natural Living. In that case, you know dehydration is a preservation technique that uses low heat and steady airflow to extract enough moisture from food through evaporation to hinder the growth of bacteria, yeast, and mold. Dehydrating is an excellent option for preserving food. Everything can be dehydrated, from tomatoes, okra, fruits, meats, and herbs to pasta sauces and condiments.
We really enjoy some good jerky around here, especially if we’re traveling or embarking on a special diet (like GAPS or a detox diet). Store-bought jerky is often not an option for us; it’s expensive and made from factory-farmed meat (sometimes…but if not, it’s even more expensive!). Not to mention, they often contain sodium nitrite, soy, sugar, and other food toxins. No thanks!
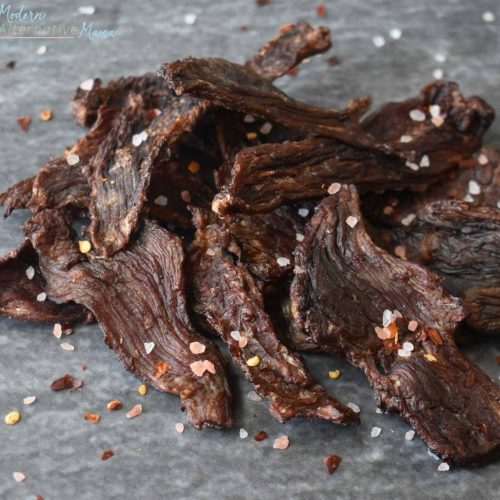
I’ve been making jerky for over 13 years, and we’ve perfected it to our tastebuds. It doesn’t taste like the sweet, tangy store-bought options. Instead, it’s its own kind of delicious. And I promise, it’s easy.
Beef Jerky
Ingredients:
- 2.5 lbs. grass-fed beef roast (bottom or top round are nice options)
- Juice of two limes or one lemon
- 1 small onion, chopped
- 3 – 4 cloves of garlic, chopped
- 1 tbsp. sea salt
- Water to cover
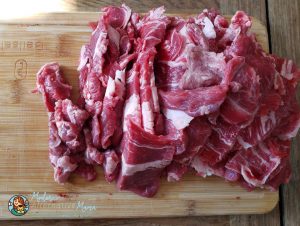
You’ll need to choose a beef roast for this. Grass-fed is best if you can access/afford it. Choose the least fatty cut because you’re cutting off the fat anyway.
The beef needs to be sliced thinly for best results. You can do it with a sharp knife and patience, but if you have a willing butcher, ask them to slice it for you! Remove as much obvious fat as you can because the fat becomes tough and unpleasant (and the jerky can spoil faster).
Step 1: Put the meat in a large bowl or mason jar and add all the ingredients. Add just enough water to cover the meat.
Step 2: Cover the bowl (or jar) and marinade in the refrigerator for 6 – 8 hours (overnight is good, too).
Step 3: Transfer the meat to dehydrator trays or a cooling rack placed on a baking sheet (if you’re using the oven). I use my Excalibur Dehydrator. Lay the strips flat with space in between them.
Step 4: Turn the dehydrator on to 155ºF (the highest setting) and leave it for 3 – 4 hours, checking until it is completely dry. If using the oven, set it to 170ºF.
Step 5: Check the jerky to ensure it’s fully dry. If it’s still squishy, bacteria could grow. If in doubt, leave it a while longer!

Beef Jerky
Ingredients
- 2.5 lbs. grass-fed beef roast bottom or top round are nice options
- Juice of two limes or one lemon
- 1 small onion chopped
- 3 - 4 cloves of garlic chopped
- 1 tbsp. sea salt
- Water to cover
Instructions
- Put the meat in a large bowl or mason jar and add all the ingredients. Add just enough water to cover the meat.
- Cover the bowl (or jar) and marinade in the refrigerator for 6 - 8 hours (overnight is good, too).
- Transfer the meat to dehydrator trays or a cooling rack placed on a baking sheet (if you're using the oven). I use my Excalibur Dehydrator. Lay the strips flat with space in between them.
- Turn the dehydrator on to 155ºF (the highest setting) and leave it for 3 - 4 hours, checking until it is completely dry. If using the oven, set it to 170ºF.
- Check the jerky to ensure it's fully dry. If it's still squishy, bacteria could grow. If in doubt, leave it a while longer!
Then, your jerky is done! Store in an air-tight container and eat whenever the mood strikes! Full of protein and very yummy. 🙂


Oh my goodness is that dehydrator expensive! How much food will you need to dehydrate before you recoup the cost?
what an awesome idea! cant wait to try it..
Anonymous,
We actually got it for about $180, not as much. I haven't figured out how much we've "gotten out of it" yet. But I figure long-term it'll be worth it because I've already used it several times.
I haven't tried making jerky, but I have dried strawberries to put into oatmeal, candied fruits (mangoes were yummy), and a healthier fruit roll-up. The roll-up was easy – put a bunch of fruit into a blender with a bit of honey. Cover the dehydrator tray with plastic wrap or freezer paper (cut out the hole in the middle), and pour the fruit mixture onto it. Dry until it's hard (should be sticky-feeling), then let cool before removing it from the tray. The humidity in the air will cause it to soften and be a sticky consistency just like the fruit candy it's named after.
If you look at the dehydrator as a mini oven, then it is cheap. You can cook yogurt in it, dry foods, make jerkey, crispy nuts – all at a lower temp than your oven will do it at. Great investment. Susan
Great post! I've made a couple batches in our dehydrator and it took a couple days as mine doesn't have a fan. I learned to cut off the fat after the first batch – yuck! Now, it tastes wonderful. I'm looking forward to trying your marinate recipe. Thanks for the inspiration 🙂
Subbing 😉 This is just what I was looking for. I think jerky is a must if meat is one of the few things you can eat do to other food restrictions/allergies. Happy coincidence that we found each other this evening 🙂 Yay!
Do you keep this in the fridge? I don’t think it would be shelf stable, right?
As long as it is fully dried, thinly sliced, and the fat content is lower, then it should be shelf stable in an air tight container for a month or so. Once opened, then refrigerate or freeze.